Adding Images
In this tutorial, we will walk you through the process of adding images to your documentation or project files. Images can enhance the visual appeal and clarity of your content, making it easier for readers to understand complex concepts.
Step 1: Prepare Your Image
Before adding an image, ensure that it is in a web-friendly format such as PNG, JPEG, or SVG. Additionally, optimize the image for web use by reducing its file size without compromising quality. You can use online tools like TinyPNG or ImageOptim for this purpose.
Step 2: Upload the Image
You need to upload the image to a location where it can be accessed by your documentation.
For this repository, all documentation images should be placed in the static/gallery/ directory.
- Navigate to the
static/gallery/directory in the project.
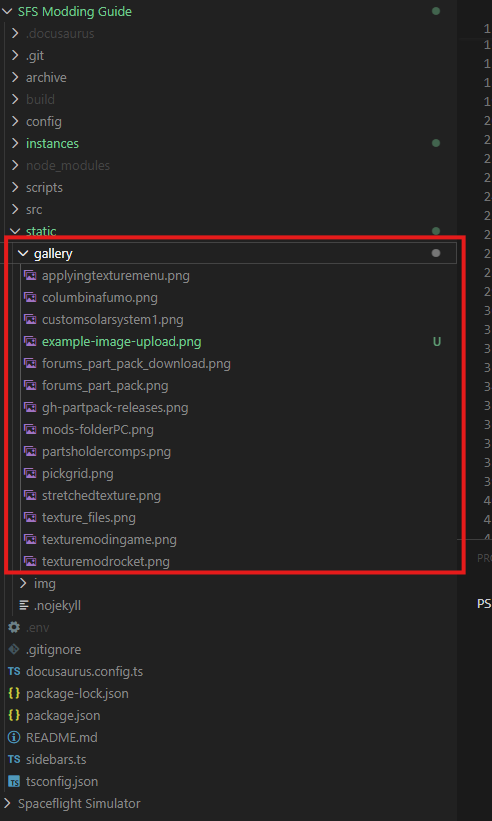
- Copy your prepared image file into this directory.
Step 3: Reference the Image in Your Documentation
To add the image to your documentation, you can use the <Figure> component provided by this documentation framework. Here’s how to do it:
---
your: frontmatter
goes: here
---

import Figure from '@site/src/components/Figure';

# Your Title Here

<Figure
  src="/gallery/your-image-file.png"
  caption="Your image caption here"
  alt="A brief description of the image for accessibility"
  widthpercent="100"
></Figure>
Replace your-image-file.png with the actual filename of your image.
The caption provides puts text below the image.
Alt text is important for accessibility, describing the image for those using screen readers. Alt text also helps with SEO (Search Engine Optimization).
The widthpercent attribute allows you to control the width of the image relative to its container. You can adjust this value as needed (e.g., 50 for half-width).
Step 4: Preview and Commit Your Changes
After adding the image reference to your documentation file, preview the changes locally to ensure that the image displays correctly. Once you are satisfied with the appearance, commit your changes to the repository with a descriptive commit message.
You should stage the new image file and the modified documentation file before committing:
git add static/gallery/your-image-file.png path/to/your/documentation-file.mdx
git commit -m "Add article (Your Title Here)"
git push origin your-branch-name
Alternatively if you are just adding an image or updating an image you can use:
git add .
git commit -m "Add/update image (your-image-file.png)"
git push origin your-branch-name
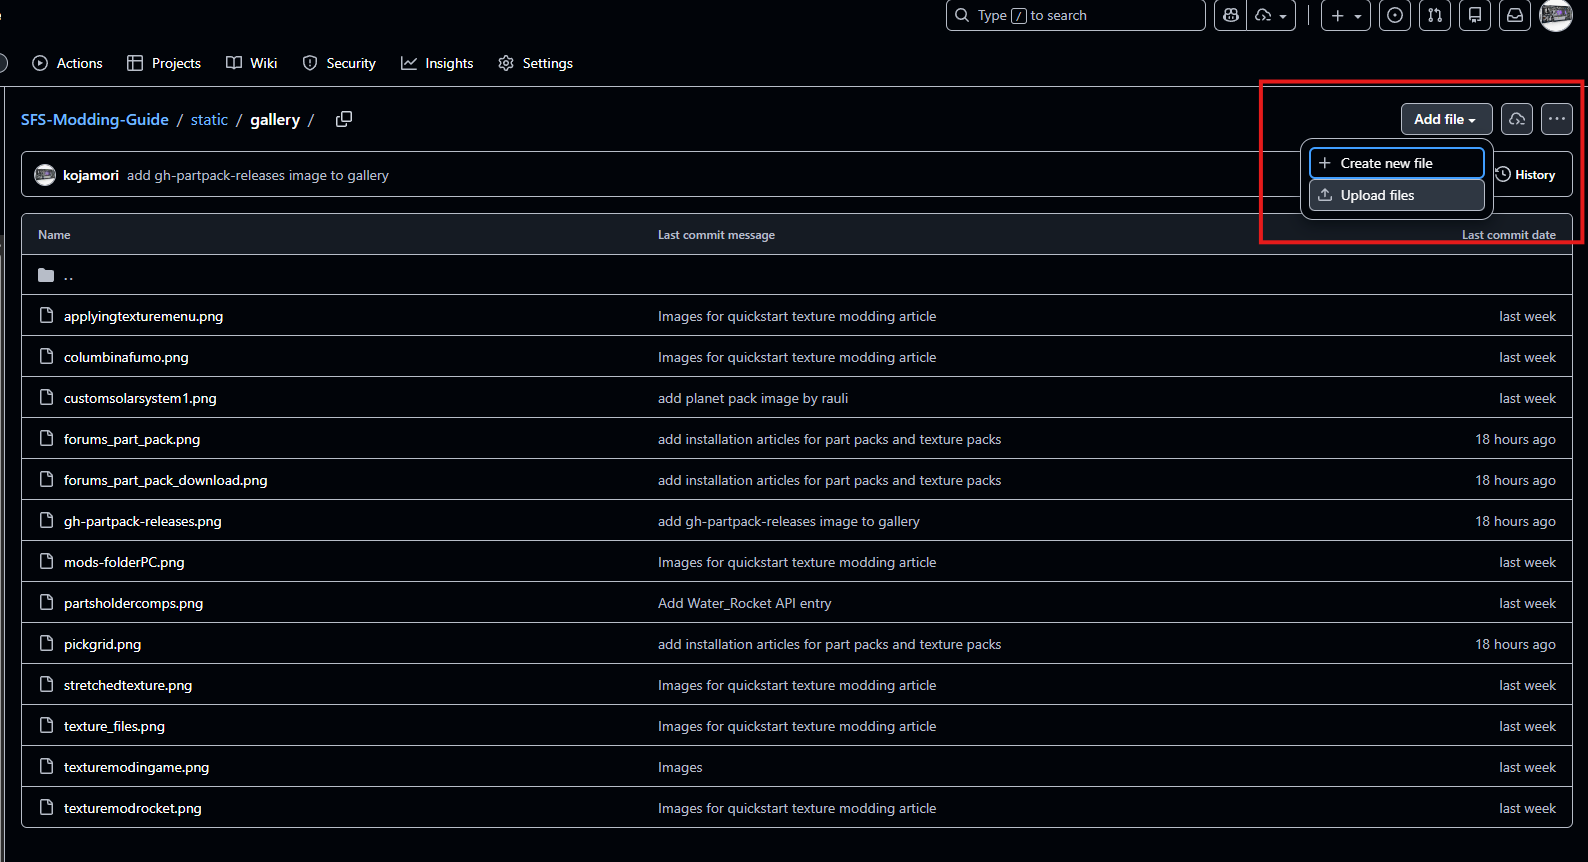
Or, if you are using a web interface like GitHub, you can upload the image directly through the web UI and edit the documentation file in the same way.
Examples
You can look at existing documentation files in this repository to see how images have been added. Here are a couple of examples:
Conclusion
Congratulations! You have successfully added an image to your documentation. Remember to always optimize images for web use and provide meaningful captions and alt text to enhance accessibility and user experience. Happy documenting!